• Twitter
  • LinkedIn
  • Facebook
Call us at 888.619.2226
Glass Paint
  • Home
  • About
  • BUY ONLINE
  • INFO
    • PRODUCTS / DATA / VIDEOS
    • HGTV
    • FAQs
    • Make Your Own Colors
    • LIMITED WARRANTY
  • Gallery
  • Contact Us
  • Blog
  • Search
  • Menu Menu
  • 0Shopping Cart

Tag Archive for: glass paint

Color schemes for paint projects

April 1, 2016/in Blog, Glass Paint/by eileen

Color schemes for paint projects

Color schemes for paint projects

Paint is a wonderful decorating medium. Most people don’t take advantage of all that paint has to offer, largely because they tend to think monochromatically when they work with paint. Using multiple paint colors can change the entire complexion of a room. Unfortunately, most people don’t know how to put together a color scheme for paint projects, so they settle for working with just one color. In addition to working with multiple colors, you can work with multiple kinds of paint. When decorating the kitchen, for example, you can use glass paint to color backsplashes, countertops or cabinet fronts, and use other kinds of paint to cover the walls and ceilings.

Putting together a paint palette

Glassprimer™ glass paint can be tinted to match any color from any major paint manufacturer. This means you can select your paints using the color chips you find in the store, and then order Glassprimer™ glass paint for paint projects. You can be sure that the glass paint will match the chip exactly!

Monochromatic colors
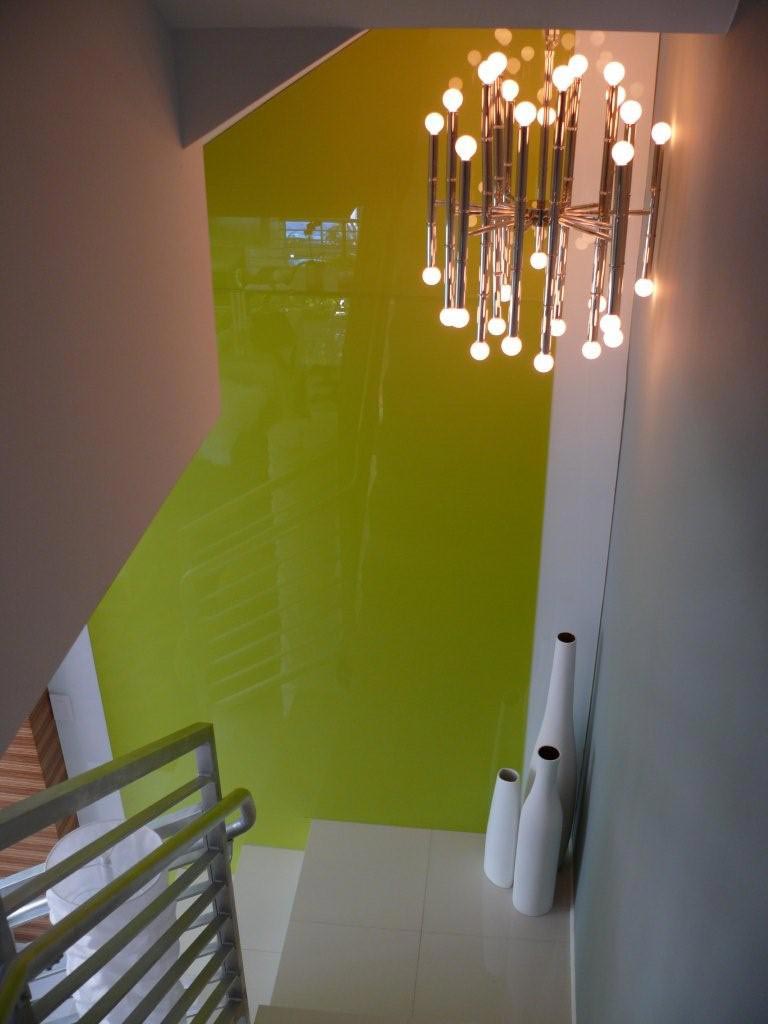
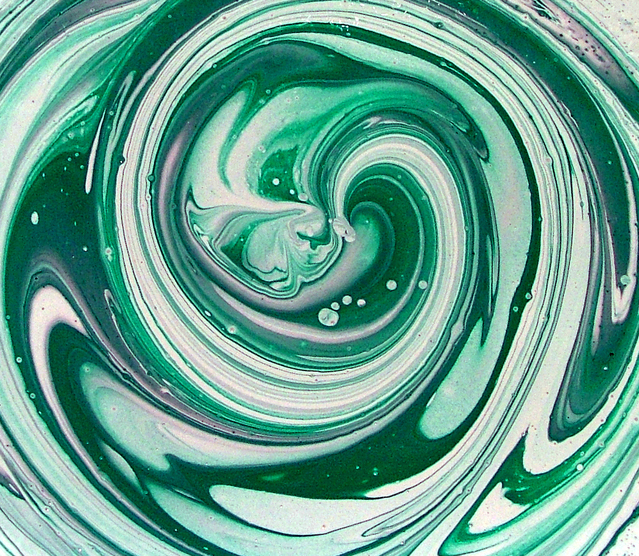
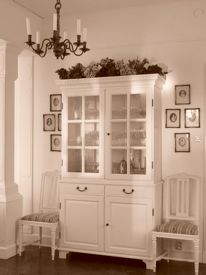
You can put together a monochromatic palette that includes multiple variations of a single color. Try blending a palette using varying saturations of the same color. Multiple monochromatic shades will produce a calming, soothing effect and work well in bathrooms and bedrooms.

Complementary colors
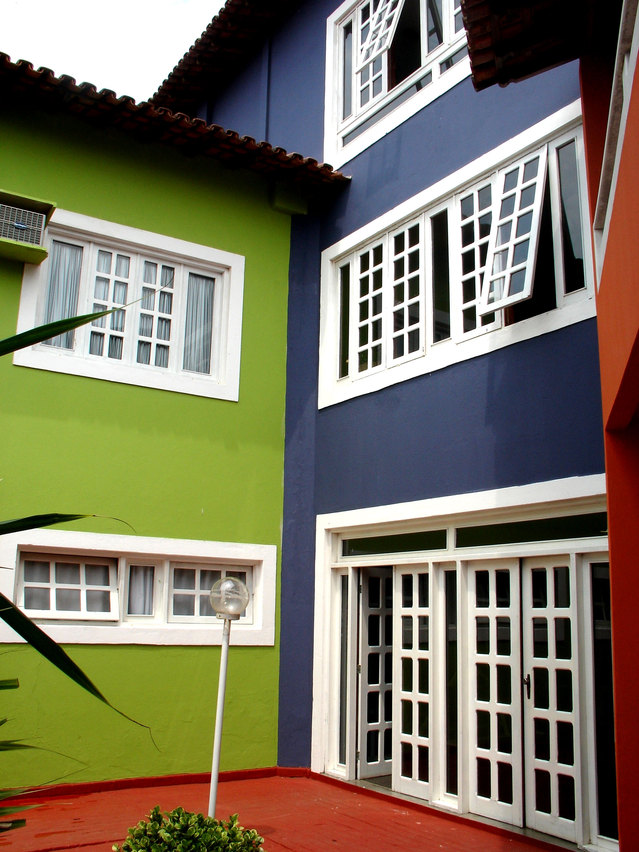
The color spectrum is often displayed as a continuum known as a “color wheel.” Using the 360-degree notation, complementary colors are those that are 180 degrees away from each other on the color wheel. In this scenario, yellow is opposite of purple, so yellow and purple are complementary colors. Blue is complementary to orange, red is complementary to green, and so on. Complementary colors can work well together within limits in paint projects, but they are instant attention-grabbers that need to be balanced out by other more neutral colors.

Analogous colors
Analogous colors are those that sit next to each other on the color wheel. Analogous colors often make comfortable companions in paint projects. Examples of analogous colors would be blue and blue-green, or green and yellow-green. Analogous colors are similar, but not quite the same, so they create interesting and harmonious combinations. When working with analogous colors, pay attention to the saturation of your analogous color choices to maintain the friendliness of your palette.

Split complementary colors
The split complementary approach to color is a complementary compromise. To create a split complementary paint palette, choose a primary color, then choose the colors immediately adjacent to the complement of your primary. Confused? If your primary is yellow, its complement is purple. Instead of choosing purple for your paint projects, choose blue and fuchsia – the two colors adjacent to the complement. You may need to play with the saturation of your colors if you plan a split complementary palette.

In the next post, I’ll look at additional color palette ideas. In the mean time, if you’d like more information about working with different colors in paint projects, or you’d like to shop for glass paint, please visit our online store!

Photo Credit: Rafael Rocha, via FreeImages.com

Using glass paint around the stove

March 30, 2016/in Blog, Glass Paint/by eileen

Using glass paint around the stove

Using glass paint around the stove

You can decorate with backpainted glass anywhere in your home, but backpainted glass is particularly useful in the kitchen. Not only does it offer an attractive appearance, it is readily available and highly durable.

Considerations for glass paint around the stove

The kitchen is a special environment. During any given day, the kitchen can see wide variations in both temperature and humidity. The materials you use in the kitchen need to be able to withstand these conditions. They also need to be able to tolerate daily cleaning and sanitizing.

Glass can meet all of these requirements. In fact, glass is a popular protective material in European kitchens. Glass is exceptionally versatile, but there are some special considerations for using it around the stove. Stoves and ovens can easily generate temperatures in excess of 500 degrees. The huge temperature differential in the area around the stove can put a lot of stress on glass. To avoid the potential for breakage, you’ll want to use tempered glass in any area where high temperatures are possible.

Glassprimer&153; glass paint is specially formulated to bond to all types of glass. This allows you to add glass safely to your kitchen, and decorate it to suit your tastes. Glassprimer&153; will form a permanent bond with the glass, which will protect the paint from changes in humidity and temperature. Glassprimer&153; glass paint won’t chip, bubble, peel or crack, even in the kitchen environment.

In areas of the kitchen that aren’t subjected to high heat, you can use non-tempered glass. This gives you greater flexibility because you can safely cut or trim non-tempered glass to accommodate electrical outlets, switches and other features that are common around kitchen countertops. If you need to cut glass that you intend to use around the stove, you’ll need to measure and cut the glass first, and then have the glass tempered to protect it from heat damage.

If you’d like more information about working with glass paint around the stove, or making backpainted glass to use in the kitchen or another area of your home, please check out the rest of our site! If you’d like to order glass paint, please visit our online store.

Photo Credit: Carlos Paes, via FreeImages.com

Backpainted Plexiglas using glass paint

March 29, 2016/in Blog, Glass Paint/by eileen

Backpainted Plexiglas using glass paintGlass paint can be used on Plexiglas, just like it can be used on a glass surface. Glassprimer™ glass paint will make a permanent bond with Plexiglas. Since Plexiglas is more flexible than glass, backpainted Plexiglas can be used in a wide range of applications.

Backpainted Plexiglas is flexible and lightweight

For large installations, Plexiglas is preferred, since it is lightweight, inexpensive and can be precision-cut to fit tight locations. The only areas in which backpainted Plexiglas should not be used are those where extreme temperature fluctuations are likely. This includes kitchen spaces and areas around fireplaces.

It’s most convenient to cut the Plexiglas to its final shape prior to painting. Cutting the Plexiglas first will avoid the possibility of damaging the paint during the cutting process.

As with glass, a successful backpainted Plexiglas project requires some simple surface preparation. To prepare Plexiglas, first wash it to remove dirt, dust and grease that might interfere with good coverage or adhesion. You can wash Plexiglas with any soap or surface preparation that removes grease and dirt.

Standard rubbing alcohol (isopropyl alcohol) can also be used to clean the surface, even though alcohol can soften Plexiglas over a long period of constant exposure. Plexiglas can be safely exposed to household cleaners containing ammonia or bleach. (As a caution, do not combine cleaners that contain ammonia and bleach because that solution will produce a noxious, toxic gas called chloramine.)

Once the Plexiglas is cleaned, you can dry it with regular paper towels. Plexiglas is prone to developing a static charge that will attract lint, dust and pet hair. As with glass preparation, avoid using “lint-free” paper towels or new cleaning towels that may shed lint on the newly cleaned Plexiglas.

When the Plexiglas is dry, sand it gently with fine grit sandpaper or steel wool. This will lightly abrade the surface of the Plexiglas and help the paint to adhere. After sanding, rewipe the surface of the Plexiglas to remove any debris or dust created by the sanding.

Once the surface is dry, it is ready to be painted. You can apply paint using a brush, roller or spray gun. As with glass, a paint sprayer will provide the most uniform application, and will help conserve paint. Apply a thin coat of paint to the surface and allow it to dry to the touch. A thin coat will dry more quickly and you can avoid runs and drips. Apply as many coats as needed to achieve the desired result.

Once the paint has completely dried and cured, you can attach the backpainted Plexiglas to the surface using a neutral cure silicone glue.

If you’d like more information about working with Glassprimer™ glass paint, please check out our site!

Glass paint in the bathroom

March 25, 2016/in Blog, Glass Paint/by eileen

Glass paint in the bathroom

Glass paint in the bathroom

The bathroom is another room in your home ideally suited for glass paint. Glass paint can be applied to a wide range of surfaces, but it’s particularly good at making a permanent bond with impervious surfaces like glass and tile. Here are a few suggestions for working with glass paint in the bathroom.

Preparing tile surfaces for painting

Glass paint works exceptionally well on the tile surfaces you’re likely to find in the bathroom. If you’re working with tiles that have already been set, take a good look at them. If you see mold or mildew on the tiles, grout or caulk, clean the affected area with a strong bleach solution. This will kill the growth and eliminate any stains that may have been created. Also, check the grout around the tile. If it has shrunk or cracked, remove the old grout and regrout before starting your paint project. Clean any stray grout off of the surface before you move forward. If you want to protect the grout from any stray paint, seal it with a grout sealer, and cover it with painter’s tape or masking tape prior to painting.

Once you’ve addressed any mold or mildew, and repaired or replaced the grout, clean the tiles as you would any other glass surface. Use alcohol and fine-grit steel wool to remove any remaining grease, soap residue or other dirt that may accumulate on the tiles. Dry the tile surfaces with ordinary paper towels. If you’re working with tiles that have not yet been set, just clean the surface with alcohol and steel wool. Wipe dry with ordinary paper towels.

Painting on bathroom tiles

Bathroom tiles have been glazed, but glass paint will bond to the glaze just as it would to glass. A small, high-quality brush will allow you to control the paint well on tiles that have already been set. You can create decorative freestyle patterns, or you can also work with a stencil to achieve your desired look. Wipe up any spills or drips immediately with a small amount of acetone. The tiles should be try to the touch in about 2 hours or less. They will be safe to handle in about 4 hours, and cured in 24-48 hours, provided you also use the Glassprimer™ glass paint catalyst. We do not recommend skipping the catalyst for “working” surfaces like bathroom tile. Without the catalyst, glass paint can take as much as a year to cure completely.

Painting on other surfaces

You can also use glass paint in the bathroom on surfaces like mirrors and windows. The key to a successful application is careful surface preparation, and the use of the catalyst to promote rapid curing. Once the paint is cured, it will stand up to the extreme changes in humidity that you will see in a bathroom.

If you’d like more information about working with glass paint in the bathroom, or you’d like to buy glass paint, please visit our online store.

Photo Credit: blue sky, via FreeImages.com

Removing glass paint

March 24, 2016/in Blog, Glass Paint/by eileen

Removing glass paint

Removing glass paint

Glassprimer™ glass paint is an interesting and versatile medium. You can use multiple coats and application techniques to achieve your desired result. Since glass resists creating a permanent bond with paint, most ordinary paints won’t stick to glass for very long. Factors like humidity, the impermeability of glass and even the paint itself affect how paint sticks to glass. While most paints will dry to the touch in a relatively short amount of time, paints applied to glass won’t “cure.” That is, they never harden enough to make themselves resistant to damage.

A few options for removing glass paint


Glassprimer™ glass paint is specially engineered to cure on glass. Without our special catalyst, the curing process can take as much as a full year. With the catalyst, Glassprimer™ glass paint cures in as little as 24-48 hours.

But that opens up the question – is removing glass paint possible, and how would you do that?

Mistakes happen – and sometimes, you just change your mind about what you want! You can still remove Glassprimer™ glass paint from glass after you’ve applied it to the glass. The trick is to act quickly!

If the paint is still wet, removing glass paint is easy when you use acetone or a standard paint stripping fluid. Once you’ve removed the paint completely, re-prepare the glass surface using isopropyl alcohol. You can then reapply the glass paint to the surface.

If the paint has already cured, you’re on the clock! Glass paint cures in about 1-2 days if you’ve used the Glassprimer™ catalyst. In this case, you’ve got about two weeks to act. Lay the glass on a flat surface or on the ground, paint side up. Pour or spray a commercially available paint stripping formula onto the paint and let the paint stripper stand. The stripping compound will soften the paint and in just a few minutes, you’ll be removing glass paint easily. You can use a hose or pressure washer to fully dislodge the remaining paint from the glass. You can also use a good degreaser to remove the rest of the paint.

Depending upon how long the paint has been on the glass, you may find that removing glass paint can be difficult in spots. You can repeat the stripping process to target these stubborn areas, or you can tackle them with a single-edged razor. Be careful to avoid scratching the glass. Once the paint has been released, you can re-prepare the glass and start fresh!

If the paint has been on the glass for a long time, rather than removing glass paint, you may be better off starting with a fresh piece of glass, since the Glassprimer™ glass paint bond is generally permanent after about two weeks.

If you’d like more information about removing glass paint, please visit us at glasspaint.com.

Photo Credit: Ariel Camilo, via FreeImages.com

Painting techniques for glass paint

March 22, 2016/in Blog, Glass Paint/by eileen

Painting techniques for glass paint

Painting techniques for glass paint

There’s nothing that looks better than an absolutely crisp, straight paint line. If you’re doing some decorative painting, you may want to know how you can achieve professional quality results without actually being a professional painter. Here are a few tips to help you achieve professional results with glass paint.

Achieving a straight line with glass paint


You can easily achieve a straight line by carefully applying painter’s tape to your surface before painting it. Use a high quality painter’s tape to avoid leaving sticky residue on the glass when you remove the tape. Let the paint cure before removing the tape!

Because glass paint takes 24-48 hours to cure, you will want to use extreme care when removing the tape to avoid damaging the paint that abuts the tape. If you intend to paint the previously taped areas using a different color, reclean the freshly exposed areas with rubbing alcohol to ensure that no adhesive from the tape remains. Cured glass paint offers excellent resistance to rubbing alcohol.

Even coverage with glass paint


If even coverage is your goal, a HVLP paint sprayer will be your best friend. To get the best coverage, move the paint sprayer in even strokes horizontally across your glass surface. Once the surface has been coated, repeat with vertical strokes to cover any spots you may have missed. Extend your strokes beyond the edges of the work piece to ensure an even coating across the entire glass surface.

Texture with glass paint


Glass paint doesn’t usually preserve brush strokes very well, but you can get variance in paint thickness by using a sponge or stippling brush. If you’re working with a small piece of glass, a paintbrush or small hand-held sponge may be the best tool. For large pieces of glass, a solvent-resistant sponge roller and very thin coats of paint will provide better variability in coverage.

Stencils


You can work with stencils to achieve patterns in glass paints. Make sure your stencil is firmly positioned. The film used for window clings (which can be found in home improvement and craft stores) is a clever way to create and apply stencils to glass. Because they hold well and don’t leave a residue, they’re ideal for creating more intricate patterns. As with painter’s tape, you’ll want to wait until the paint is cured to remove the stencil.

If you’d like more information about glass paint, or would like to purchase glass paint online, please visit our online store.

Photo Credit: Michelle Kwajafa, via FreeImages.com

How To Apply Glass Paint For Best Results

March 21, 2016/in Blog, Glass Paint/by eileen

How To Apply Glass Paint For Best Results

How To Apply Glass Paint For Best Results

If you’re not a professional painter – and most people aren’t – you might wonder how you can get the best results when applying glass paint to a surface. Glass paint is a versatile medium and you can apply it in a number of ways. Here are a few tips to help you get the best results from your glass paint project.

Tips to Apply Glass Paint


You can apply glass paint using the same techniques you use to apply ordinary paint to a surface, but some painting techniques yield better results.

Spraying to apply glass paint


A high-volume, low-pressure (HVLP) paint sprayer is the applicator of choice for glass paint projects. These devices allow you to spray paint evenly and quickly, and help prevent overspray. Because these tools are so effective at applying paint, they actually reduce the amount of paint you use by up to 40%. HVLP paint sprayers have a built in compressor that applies even pressure to the liquid paint, and offers a transfer efficiency of about 90%.

Usually, HVLP paint sprayers have adjustable spray patterns, so you can paint using vertical, horizontal or circular motions to achieve the desired coverage effect. In addition to spraying paint, a HVLP sprayer can apply lacquer, varnish and stain, so it can quickly become a go-to tool for the do-it-yourself decorator. As an added benefit, HVLP sprayers apply paint very evenly, so they tend to reduce the drying time required. You can find HVLP paint sprayers in hardware and home improvement stores.

Rolling to apply glass paint


If you don’t have a HVLP paint sprayer or are looking for a different effect, you can apply glass paint with a paint roller. Take some time to choose the correct roller, though! You want to look for a solvent-resistant mohair roller. You can choose any nap, however you’ll get better results with even, thin coatings of paint. Thicker nap on a roller will absorb more paint. You’ll extend your drying time and you’ll use more paint with each coating. Mohair rollers are available in home improvement and hardware stores, but be sure to choose the right materials. The most inexpensive paint rollers are synthetic, and they will not produce the same high quality results that mohair rollers will.

Brushing to apply glass paint


If you need a lot of control over your glass paint application, you can use a good quality, solvent resistant mohair paintbrush. Brushes come in a variety of widths, but as with paint rollers, you’ll get better results with even, thin coatings of paint. If you have a large surface to cover, a roller will give you more even application than a brush will. Mohair brushes are available in home improvement and hardware stores. Like paint rollers, the most inexpensive paint brushes are synthetic, and they will not produce the same high quality results that mohair brushes will.

If you’d like more information about glass paint, or would like to purchase glass paint online, please visit our online store.

Photo Credit: Frank Hermers, via FreeImages.com

Surface preparation for glass paint

March 20, 2016/in Blog, Glass Paint/by eileen
Surface preparation for glass paint

Surface preparation for glass paint

Since glass paint isn’t like ordinary paint, you will need to perform some recommended surface preparation before painting to achieve the best results. Here are some tips to ensure that your glass paint project is a success.

Glass paint surface preparation

To complete proper surface preparation for a glass paint project, you’ll need rubbing alcohol, paper towels, latex gloves and fine-grit steel wool. We recommend #000 or #0000 gauge steel wool. You can buy a pack of disposable latex gloves (like the kind you see in a doctor’s office), in the paint section of a hardware store. You’ll also need ordinary paper towels. It’s a bit counterintuitive, but don’t use lint-free paper towels or shop towels – the ordinary store-brand paper towels you find in the grocery store will do just fine!

Put on your gloves and spray the surface to be painted with rubbing alcohol. Scrub it thoroughly with the steel wool. You may have to repeat this step if the glass you’re working with is dirty, dusty or has significant surface imperfections. Make sure you spray and scrub every inch of all surfaces you plan to paint!

Once you’ve completed this step, wipe the surface(s) to be painted with more rubbing alcohol and paper towels. Repeat this until the glass squeaks when you rub it. Once the glass is clean, do not handle it with your bare hands! Change out your latex gloves as needed to keep the glass clean. If you plan to coat more than one surface, prepare each surface separately to keep each one as clean as possible and do your surface preparation immediately before painting.

That’s it! Your surface is now ready to take its first coat of glass paint! Depending upon the size of the project and how you apply the paint, you may have to wait several hours between coats. The drying time for a single coat of glass paint will vary, based on the thickness of the coat you’ve applied and the humidity in the air. High humidity will significantly increase the drying time. Under ideal humidity conditions, glass paint will be dry to the touch in about 2.5 hours, and can be safely handled after about 4 hours. The paint will be fully cured in 24-48 hours when you’ve used the catalyst. If you have not used the gatalyst (which we do not recommend), the paint may take up to a full year to cure.

If you’d like more information about glass paint, or would like to purchase glass paint online, please visit our online store.

Glassprimer™ catalyst – what exactly does it do?

March 17, 2016/in Blog, Glass Paint/by eileen

Glassprimer™ catalyst – what exactly does it do?

Glassprimer™ catalyst – what exactly does it do?

A common misperception about Glassprimer™ catalyst is that it turns any paint into glass paint. Here’s a rundown on what the catalyst is and what it does.

Glassprimer™ catalyst works with Glassprimer™ paint


Paint (of any kind) doesn’t like to stick to certain surfaces, glass being one of them. Generally, paint “prefers” porous surfaces. If the target surface isn’t at least somewhat porous, the paint will not adhere well.

Liquid paint contains solvents. When the paint is applied to a surface, the solvents gradually evaporate from the paint and the paint dries. Oil based paints dry to the touch in about 6-8 hours. Latex paints dry to the touch in about an hour. But just because a paint is dry doesn’t mean that the paint is “cured.”

Oil-based paints cure in about 7 days. Latex paints take much longer – about 30 days to cure. Once a paint is cured, it is hardened and firmly bonded to the surface. Left to itself, glass paint might take as long as a year to cure. That means the paint would be soft, easily damaged or dislodged, and not firmly bonded to the surface it was applied to. Most folks don’t have a year to wait for paint to cure, so to help reduce the curing time for glass paint, we strongly recommend the addition of something to speed up the curing process.

The Glassprimer™ component B catalyst does just that. When you add the catalyst to Glassprimer™ glass paint, the curing time is reduced to about 24-48 hours – much faster and more practical than a year! Once the paint is cured, the bond to the glass is permanent. Humidity in the air won’t cause the paint to peel, chip or flake, and glues and caulks won’t show through backpainted glass.

The catalyst is designed to work exclusively with Glassprimer™ glass paint to help the paint cure. It does not work with other paints, and it will not allow an ordinary paint to create a permanent bond with glass. It was designed specifically to help reduce the curing time of Glassprimer™ glass paint.

If you’d like more information about working with glass paint, or the Glassprimer™ component B catalyst, please visit our online store.

Photo Credit: Cagatay Cevik, via FreeImages.com

Using glass paint in the kitchen

March 16, 2016/in Blog, Glass Paint/by eileen

Using glass paint in the kitchen

Using glass paint in the kitchen

If you’re looking for decorating ideas, look no farther than your kitchen! Glass paint makes a great decorating medium for the kitchen because it’s durable, and can stand up to what’s likely to be the toughest environment in your home. As a surface, glass is ideal in the kitchen because it’s tough, impervious and easy to clean.

Glass paint projects for the kitchen

Backpainted glass works well as a backsplash material, and also works well around the stove. Glassprimer™ glass paint works with the catalyst to create a fast, permanent bond to the glass surface. This is ideal because once the Glassprimer™ paint has cured (24-48 hours) the paint will stick to the glass under even the most challenging conditions.

The kitchen – especially around the sink and stove – is often filled with moist air. Moisture in the air will cause most paints to peel, regardless of what surface they’re applied to. Glassprimer™ paint is different. It is specially engineered to resist humidity, and will never peel or chip.

The permanent bond also means that you can safely attach glass to the wall using mastics or glues that will not seep through the paint – immediately or over time. A backsplash decorated with glass paint will retain its good looks and true color for years to come. And because the backsplash is made of glass, it can be cleaned and sanitized with common household cleaners.

If you intend to install a backsplash that uses glass paint and you intend to use it around the stove, be sure to use tempered glass. Tempered glass is specially heat treated (or chemical-treated) to make it stronger and better able to withstand “insults” that would break untreated glass.

Tempered glass is more expensive, and it cannot be cut once the glass is finished. This is because the outer surface of the glass is compressed, which places the inner surface of the glass under tension. The balance of compression and tension makes the glass stronger, but means that the glass will shatter once the outer surface has been breached. One more note of caution: you can’t cover existing electrical outlets with glass or any other material. You’ll need to move above-the-counter electrical outlets before mounting your backsplash.

Backpainted glass cabinet doors also make a stunning addition to a kitchen. Whether you’re aiming for clear glass, frosted glass or backpainted glass bonded to existing cabinet doors, glass cabinet fronts lend an air of sophistication to your kitchen. Using Glassprimer™ paint, you can apply any color under the rainbow and give your kitchen cabinets an immediate facelift!

If you’d like more information about using Glassprimer™ to decorate your kitchen, or would like to buy Glassprimer™ glass paint, visit our online store to place your order!

Photo Credit: Marmit, via FreeImages.com

Page 19 of 20«‹17181920›
Popular
  • Customer Reviews / Post your ReviewsMarch 1, 2010 - 9:21 am
  • Glass Paint ForumMay 10, 2010 - 3:55 pm
  • We are Professional Grade Glass PaintSeptember 11, 2014 - 11:51 am
  • VOC Compliance…September 11, 2014 - 11:59 am
Recent
  • What kind of paint can be used on glass?October 17, 2017 - 5:05 pm
  • Tips for using glass paintOctober 17, 2017 - 4:55 pm
  • How to use glass paintOctober 17, 2017 - 4:47 pm
  • Backpainted glass backsplash is a great seasonal project
    Backpainted glass backsplash is a great seasonal projec...June 29, 2017 - 12:00 pm
Comments
Tags
art glass backpainted glass colored glass commercial glass container glass decorating with glass energy efficient glass flat glass frosted glass glass glass bridge Glass Building glass buildings glass coating glass coatings glass decorating glass decoration glass design glass doors glass paint glass paint bathroom glass painting glass paint kitchen glass paint projects glass pool glass printing glass recycling glass strength Gorilla glass how to paint glass iconic glass structures interior glass low e glass metallic glass opaque glass painted glass painting glass photovoltaic glass radioactive glass recycled glass recycling glass safety glass smart glass stained glass tempered glass

Categories

  • Activator
  • Blog
  • Glass Paint
  • Home slider
  • home-first-coloum
  • home-first-row
  • home-second-column
  • home-testimonial-row
  • Skip
  • Uncategorized

ABOUT

Glass Paint – self-priming/permanent-bonding glass paint began outside of the USA in early 1997. In late 2003 Glass Paint moved to the USA for distribution in North America.

QUICK MENU

  • Contact
  • Blog
  • Glass Paint FaQs
  • LIMITED WARRANTY
  • PRODUCTS / DATA / VIDEOS
  • Sitemap

Products

  • Complete Package, Glass Paint Component “A/B” GPPP083®/GPUC083® (Self-Priming Glass Paint/Catalyst) Complete Package, Glass Paint Component “A/B” GPPP083®/GPUC083® (Self-Priming Glass Paint/Catalyst) $265.00
  • Glass Paint Component “A” GPPP083® (Self-Priming Glass Paint only) **Catalyst required Glass Paint Component “A” GPPP083® (Self-Priming Glass Paint only) **Catalyst required $190.00

CONTACT INFO

USA / International

Toll Free: 888.619.2226
Atlanta, Georgia: 718.374.5229
Brooklyn, New York: 718.374.5229
Fax: 888.619.2226
E-Mail: [email protected]
© 2024 Glass Paint. All rights reserved - Enfold Theme by Kriesi
  • Twitter
  • LinkedIn
  • Facebook
Scroll to top